The Amber Signal: Judging Annealing Heat by Colour at the UK Bench
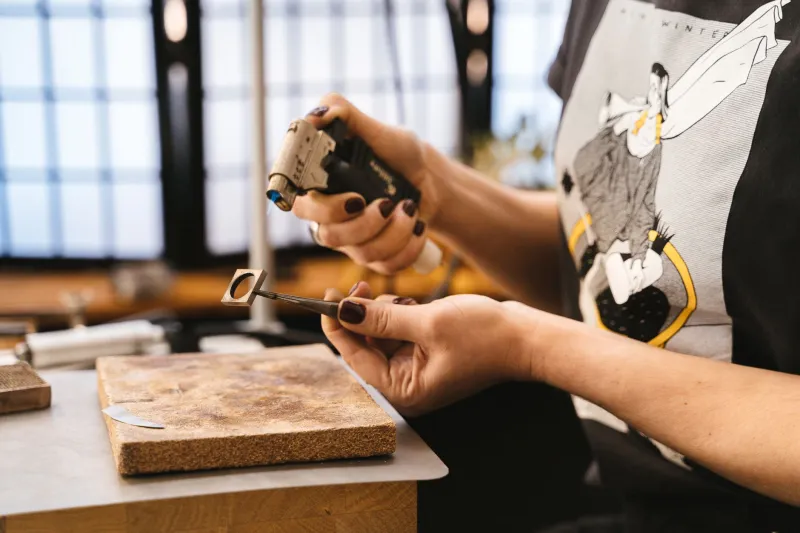
Annealing is one of the first processes a jewellery student learns to perform and one of the last to be mastered. The task appears simple: heat the metal until it softens, then cool it in a controlled way. In practice, the decision to stop heating is made under time pressure, with a torch in one hand and a small, often awkwardly shaped workpiece in the other. In well-equipped workshops, a temperature-controlled furnace or a pyrometer may remove some of the uncertainty. In home studios, shared benches and teaching rooms across the UK, the jeweller usually has only colour, flame and experience.
That is not a deficiency to be apologised for. Colour judgement is a legitimate bench skill, but it must be taught with the same rigour as sawing, filing or soldering. The glow of hot metal is not a thermometer. It is a signal that changes with alloy, surface condition, flame setting, ambient light and the observer's own eye. Reading it well requires rehearsal and record-keeping, not merely confidence.
Why colour is a proxy, not a measurement
When a metal is heated, it emits visible radiation. At lower temperatures the emission is invisible; as temperature rises, the metal passes through dull red, cherry red and orange. The exact appearance depends on the alloy and on the amount of light in the room. A piece of sterling silver that looks a sober dull red under a dim bench lamp may appear almost grey in bright daylight. Copper and brass show colour more readily. Gold alloys vary considerably according to their composition, with white golds and palladium-containing alloys behaving differently from yellow golds.
Students should therefore treat colour as a comparative signal. The useful question is not “what exact temperature is this?” but “what does this alloy look like when it is ready for the next operation?” That question can only be answered by observation, practice and a consistent bench environment.
The lighting problem in UK studios
British workshop lighting is rarely neutral. A north-facing window may provide soft, cool daylight for part of the year and little else during a grey winter afternoon. Bench lamps may be daylight-balanced LEDs, warm domestic bulbs or a mixture of both. Some shared studios use overhead fluorescent fittings that render reds poorly. Each of these conditions alters the apparent colour of hot metal.
A simple lighting audit is a useful first exercise. Place a piece of annealed silver and a piece of copper on a heatproof surface. Observe them under the bench lamp, under any overhead lighting and near a window. Then repeat the observation during heating, taking care to keep the room safely lit rather than fully dark. Students often discover that their bench lamp washes out the first visible red, encouraging them to overheat. A low ambient light level, combined with a focused work lamp aimed away from the metal, usually gives a clearer view of the glow without compromising safety.
What the glow suggests for common jewellery metals
Sterling silver is the metal most UK students meet first. In typical bench lighting it moves from a barely visible warmth to a dull red and then to a brighter cherry red. For most annealing operations, the aim is to reach the dull red stage and hold it briefly, avoiding a prolonged bright glow. Overheating sterling silver can encourage firestain, a surface discolouration caused by oxidation of the copper content, and can coarsen the grain structure. Both effects make subsequent polishing and forming harder.
Copper is more forgiving to read because its oxide colours are familiar, but it also heats quickly. Thin copper sheet can pass through the useful range before the student has adjusted the torch. Brass behaves similarly but can lose zinc if overheated, producing a dull surface and fumes. Gold alloys demand more experience: colour development varies, and some alloys are better annealed by air cooling than by quenching. Students should follow the specific guidance for the alloy in front of them rather than transferring silver habits to gold.
Overheating: the quiet fault
Overheating rarely announces itself with a dramatic failure. Instead, it appears later as a crack during forming, a stubborn firestain after pickling, or a solder joint that refuses to flow cleanly. The common causes are easy to list: a flame that is too large, a workpiece held too long at bright red, uneven heating between thick and thin sections, and a bench lamp that makes the early glow invisible.
A useful discipline is to heat in short, deliberate passes. Bring the metal to colour, remove the torch, observe, and return if necessary. This is slower than a continuous sweep, but it teaches the student to associate flame position and time with the visible signal. It also reduces the temptation to keep heating simply because the metal does not yet look ready.
Rehearsal exercises before soldering and forming
The following exercises can be carried out with inexpensive metal samples and a standard torch. They are intended for teaching benches, but they adapt well to a home studio.
1. The marked-strip ladder
Take a strip of copper or sterling silver and mark it into four sections with a scribe. Anneal each section to a different visible colour: barely warm, dull red, cherry red and bright red. Quench or cool according to the metal, then bend each section until it deforms. Record which sections bend easily and which show cracking or surface damage. The exercise connects colour with behaviour rather than with a number.
2. The known-sample comparison
Keep a small annealed coupon of the same alloy at the bench. Before heating a new workpiece, place the coupon beside it under the same lighting. The comparison helps calibrate the eye and is particularly useful when changing from one alloy to another.
3. The torch map
On a scrap piece, practise moving the flame in small circles without allowing any one area to glow brightly. The aim is to observe how heat spreads through the metal and how the colour shadow moves. This builds the coordination needed for annealing irregular shapes such as ring shanks and clasp components.
4. The blind ranking
Ask a fellow student or tutor to prepare several samples at different temperatures and mix them. Rank them by colour under the bench lamp, then test each by bending. Discrepancies between the ranking and the bend test are valuable: they show where lighting or technique is misleading the eye.
Recording what the eye learns
A bench notebook is as useful for annealing as it is for soldering. Record the alloy, thickness, flame setting, lighting conditions, observed colour and outcome. Over several weeks, patterns emerge. Students often find that their “dull red” is another person's “cherry red”, or that a particular bench lamp consistently encourages overheating. Such notes turn colour judgement from a vague instinct into a repeatable bench method.
In UK training, where small studios and shared benches are common, the ability to anneal by eye remains a practical necessity. It is not a substitute for understanding temperature, but it is a skill worth teaching explicitly. With careful lighting, metal-specific observation and simple rehearsal, students can learn to read the glow with enough consistency to support the forming and soldering work that follows.