Five Ring-Band Methods Worth Rehearsing: A 2026 Bench Guide for UK Jewellery Students
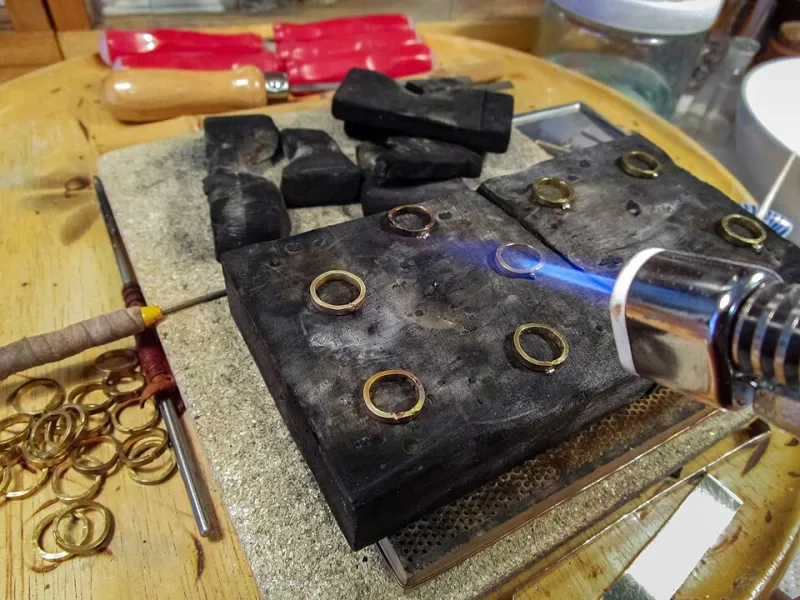
Photo: W.carter, CC BY-SA 4.0, via Wikimedia Commons
Ring bands are often treated as the quiet supporting act of a piece: the shank holds the stone, the shoulders frame it and the gallery does the visible work. At Holt's Academy, we see a different opportunity. The band is a compact testing ground for proportion, joinery, finish and wearability. For students in the UK it is also one of the most affordable places to develop a signature style, because a band can be made in copper, brass, gilding metal or a modest amount of silver before a design is committed to precious metal.
The five methods below are not new to the trade, but they remain under-rehearsed in many workshop programmes. Each can be practised with a small tool kit: a jeweller's saw, files, soldering equipment, a rolling mill where available and a reliable set of abrasive grades. None requires a specialist department. What they require is repetition, measurement and a habit of documenting what worked.
Why the band rewards experimentation
A ring is a piece of engineering as much as an ornament. It must pass over the knuckle, sit comfortably, survive daily wear and, in the UK, carry the correct hallmark when it is offered for sale. That combination makes the band an unusually honest test of a maker's control. A fault in a pendant can be hidden by a fold or a bail; a fault in a band is felt by the wearer every day.
For students, the practical advantage is cost. A term's worth of band exercises can be completed in base metal and then repeated once in silver. The aim is not to produce a saleable collection at this stage. It is to build a vocabulary of edges, joins and surfaces that can later be applied to commissioned work.
1. Split shank: controlled separation
A split shank divides the band into two or more strands, usually at the shoulders, so that the ring appears wider without becoming heavy. The technique is familiar in engagement rings, but it is rarely explored as a standalone exercise. That is a mistake. A split shank teaches symmetry, solder order and the importance of leaving enough metal at the junction.
Practice drill: cut two lengths of 2mm by 1.5mm rectangular wire in copper or sterling silver. Anneal and form each over a ring mandrel, keeping the curves matched. Solder a small cross-bar at the back with hard solder, then close the shoulders with medium solder. File the split to an even width and check the gap with callipers at three points. Repeat until the two strands sit parallel without touching.
UK supplier note: rectangular wire and D-section stock are readily available from Cooksongold and Betts Metals. Students in the Birmingham Jewellery Quarter can also compare pre-formed findings from local suppliers, but the exercise should begin with wire so that the forming is understood.
Student example: a recent Holt's Academy bench exercise used a split shank in gilding metal to test how a wide band could remain light. The final silver version was hallmarked through the Birmingham Assay Office, and the student's log recorded that the second attempt required less solder and filed more cleanly than the first.
2. Tension-set bands: pressure with proof
Tension-set rings rely on the elastic memory of the metal to hold a stone without a conventional setting. They are not a beginner's first stone-setting project. The band must be made from a suitable hard alloy, typically 950 palladium or a hardened 18ct white gold, and the seat must be cut with controlled clearance. The consequences of a poor calculation are obvious and expensive.
Practice drill: before touching a stone, make three copper or brass bands with a 0.2mm slot and measure the deflection with callipers. Record how far each band opens under gentle pressure and whether it returns to shape. Then make a non-wearable sample in brass with a cubic zirconia, using a bench peg and a careful saw cut. The object is to understand geometry, not to produce a retail piece.
UK supplier note: do not substitute sterling silver for a tension setting; it is too soft for safe wear. Palladium and hardened white gold are available through UK bullion suppliers, and assay offices will expect the finished piece to be marked correctly. If a student cannot yet justify the metal cost, the brass sample is the correct stopping point.
3. Hollow-form: lightness with structure
Hollow-form bands use sheet or tube to create volume without weight. A simple version is a D-section band made from two pieces of 0.5mm sheet, soldered along the edges and filed to a clean seam. The method is useful for wide bands, because a solid band of the same appearance would be uncomfortable and unnecessarily expensive.
Practice drill: roll a 0.5mm copper sheet flat, cut two strips and form them over a mandrel. Solder the edges with hard solder, using a heat sink to keep the curve stable. File the seam flush, check the interior for trapped flux and weigh the finished band against a solid sample of the same dimensions. A well-made hollow band should feel rigid in the hand and light on the finger.
Student example: one academy project paired a hollow-form band with a brushed finish to test wearability over a fortnight. The student found that the seam needed additional cleanup at the inside edge, a detail that would have been invisible in a photograph but noticeable to the wearer.
4. Brushed finish: consistency over shine
A brushed finish is not a single technique but a system of scratch patterns. A consistent brushed band is more difficult than a mirror polish because every mark must run in the same direction. It also shows handling marks, so the maker must decide whether the surface is intended to age or to remain uniform.
Practice drill: prepare three copper bands and finish them with 400, 600 and 1200 grit abrasives respectively. Then apply a Scotch-Brite or brass bristle brush in one direction only, rotating the band rather than the brush where possible. Photograph each stage under the same light. The exercise is complete when the three samples show a deliberate progression rather than three versions of the same scratch.
UK supplier note: 3M Scotch-Brite radial bristle discs are available from jewellery suppliers and are more predictable than hardware-grade abrasives. Keep the grades separate and labelled; cross-contamination is the most common reason a brushed finish looks muddy.
5. Bi-metal construction: the join as design
Bi-metal construction joins two metals, such as sterling silver and copper or two colours of gold, so that the join becomes part of the design. The main risks are differential expansion and solder choice. A join that looks clean at the bench can open after repeated polishing if the wrong solder is used.
Practice drill: begin with copper and brass, which are inexpensive and visually clear. Cut two strips of equal thickness, clean the mating faces, flux sparingly and solder with easy solder. Use a heat sink to draw heat away from the thinner section. File the join flat, then polish across the seam to see whether the solder line remains crisp. Repeat with a second sample using medium solder and compare the results.
Student example: a Holt's Academy student used a copper and sterling bi-metal band to explore a two-tone effect without the cost of gold. The final piece required careful advice on hallmarking, because the assay office assesses each precious component separately. The student's notes became a useful case study for the cohort on why mixed-metal designs need to be planned before the bench session, not after it.
A term-long sequence
A practical sequence for a ten-week term is to spend two weeks on each method, with the final two weeks reserved for a resolved band that combines no more than two techniques. Split shank and brushed finish work well together; hollow-form and bi-metal demand more careful soldering and should not be paired until the basic joins are reliable. Each student should keep a bench log with measurements, solder grades, finishing sequence and photographs.
What the band teaches
The value of these exercises is not that every student will specialise in rings. It is that the band compresses the core decisions of jewellery-making into a small, wearable object. A maker who can control a split, a seam, a tension gap and a brushed surface is better prepared for brooches, lockets and commissioned repairs. The band is not a minor form. At Holt's Academy, it is one of the most efficient ways to build judgement.