The Wandering Line: Diagnosing Piercing Faults Before You Buy Another Blade
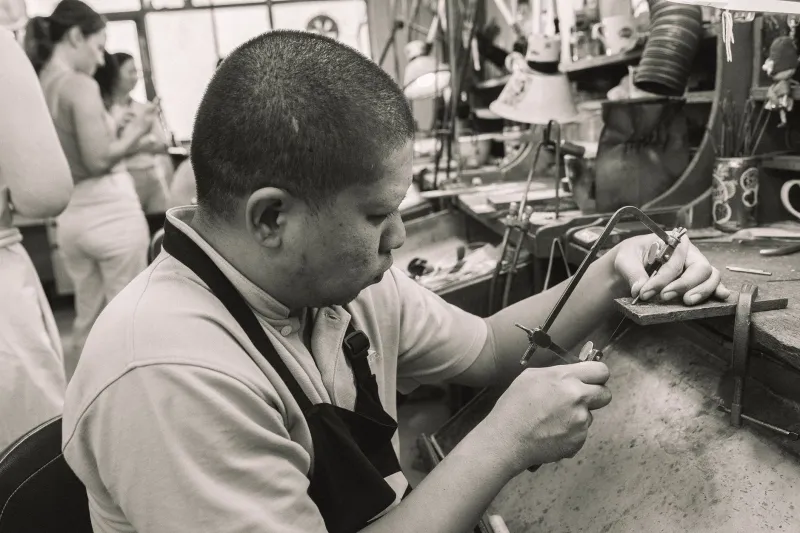
Every bench tutor in the country has watched the same thing happen. A student marks a curve on a piece of 0.8 mm copper, settles at the peg, and within twenty millimetres the blade has drifted off the line. The instinctive response is to press harder and saw faster. Both make the problem worse. Clean piercing is not a demonstration of willpower; it is the outcome of a frame that has been set properly, a blade suited to the metal, a start hole that permits the blade to sit square, and a body positioned so that the arm can travel without steering the cut.
What follows is an argument for slowing down at four setup stages, then rehearsing five specific shapes until the hands no longer need to be told what to do.
Why a piercing line wanders
The fault is almost never in the eye. Students who can draw a clean curve on paper routinely cut a ragged one in metal, which tells us the difficulty is mechanical rather than visual. A saw blade removes a kerf of fixed width and will only follow the path of least resistance. If the frame is twisted, the blade is blunt, the tension is slack or the metal is being pushed into the blade rather than the blade being drawn through the metal, the cut will seek the easiest route and that route is rarely the drawn line.
Diagnosis, therefore, begins with a short series of questions asked in order. Is the blade sharp and correctly sized? Is the frame square and the tension high enough to produce a clear note when plucked? Is the metal supported close to the cut? Is the hand applying downward force? Answering these before reaching for a fresh blade saves both money and temper.
Setting the frame: tension, direction and blade choice
A jeweller's saw frame is a spring, not a handle. The blade should be mounted with the teeth pointing downwards and towards the handle, so that cutting occurs on the forward stroke. Clamp the blade at the far end first, brace the frame against the bench edge, then compress it slightly as the near end is tightened. The correct tension produces a short, high pitch when the blade is plucked; a dull thud indicates slack, which allows the blade to bow inside the cut and wander.
Blade selection is a matter of stock thickness rather than preference. For sheet below roughly 1 mm, a 4/0 or 3/0 blade is appropriate; for 1 to 2 mm, a 1/0 or 0; heavier section work calls for a 2 or 3. As a working rule, aim for three to five teeth in contact with the metal at any moment. Too fine a blade clogs and overheats; too coarse a blade snags and jerks, and a jerk is a line lost.
Start holes are not an afterthought
Internal piercing lives or dies at the drill. Mark the entry point with a centre punch so the bit does not skate, then use a 0.8 mm or 1.0 mm drill held vertically. Drill against a sacrificial wooden block or with the work supported on a pitch bowl, and ease the pressure as the bit breaks through so the underside is not burred. Deburr both faces before the blade goes in.
A hole drilled at an angle forces the blade to enter at an angle, and a blade that starts crooked generally finishes crooked. If the hole has gone wrong, drill it again rather than fighting the saw.
Posture at the peg
The bench peg should sit at roughly sternum height when seated, with the elbows close to the body and the shoulders relaxed. The saw is held lightly, with the handle resting in the palm and the fingers guiding rather than gripping. Sight the line ahead of the blade, not beneath it, and keep the blade vertical in both planes; twisting the frame to steer is the single most common cause of a broken blade in student work.
Stroke rate matters less than stroke consistency. Around sixty to seventy strokes per minute, with cutting across roughly two-thirds of the blade length, gives the teeth time to work. Cutting on the return stroke, or lifting the blade clear on every pass, removes the rhythm that keeps a line true.
Five rehearsals worth repeating
These drills are deliberately dull. Each is cut in 0.8 mm copper or brass, and each should be repeated until the result is repeatable on three consecutive attempts.
- The straight line. Cut a 50 mm line down a strip, turning the work rather than the frame. The objective is a kerf that stays within half a millimetre of the scribed line over its full length.
- The right angle. Cut an L-shape with a clean internal corner, achieved by sawing to the corner and then reversing the work rather than twisting the blade. Corners expose any tendency to force.
- The spiral. A single continuous spiral, turning the metal steadily. This drill teaches the coordination between hand, eye and peg that free curves demand.
- The circle. Cut a 20 mm circle by rotating the work continuously, keeping the frame still. A faceted circle indicates interrupted rotation.
- The window. Drill a start hole, thread the blade, and cut an internal aperture with a return to the entry point. This is the closest rehearsal to professional piercing work and the one that most reliably exposes poor blade tension.
Reading the cut: a short fault-finder
A line that curves away consistently in one direction usually points to a frame that is not square or a hand applying lateral pressure. A line that steps and jerks suggests too coarse a blade or metal that is not supported close to the cut. A blade that breaks repeatedly at the same point in a stroke is often a symptom of a slack frame or a saw held too tightly. A cut that is wide and ragged at the top but narrow at the bottom indicates the work was pushed into the blade rather than fed beneath it.
Recording these observations in a bench notebook is worthwhile. Faults recur in patterns, and a written record converts a vague sense of frustration into a checklist.
Rehearsal over speed
Speed at the saw is a by-product of repetition, not a target in itself. Students preparing for bench tests, whether through a college course, an apprenticeship in the Jewellery Quarter or an independent short course, gain far more from five carefully observed drills than from an hour of hurried production. The hands learn through repetition and correction; the eye learns by comparing the finished cut against the drawn line.
Cutting, as distinct from sawing, means allowing the blade to do the work while the maker concentrates on position, tension and support. That is a discipline, and like any discipline it is built at the peg, one rehearsal at a time.