Cold Confidence: Building a First Riveted Sample Set in Copper and Brass
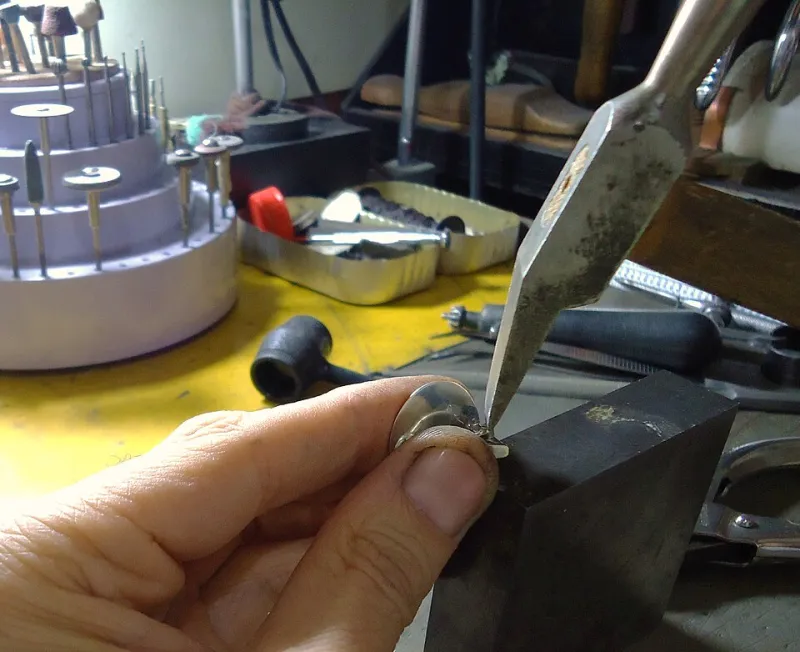
Photo: Mauro Cateb, CC BY-SA 3.0, via Wikimedia Commons
Soldering dominates the beginner imagination. It is visible, dramatic and slightly feared. Riveting, by contrast, can seem modest: a pin, a hole, a formed head. That modesty is precisely why cold connections deserve an early place at the UK student bench. A rivet asks the maker to measure carefully, drill squarely, control a burr and judge a joint by feel. It also fails visibly and reversibly, which makes it an unusually good confidence skill.
Why start cold
A soldered joint can look acceptable while hiding poor fit. A rivet cannot. If the plates do not meet, the gap shows. If the hole is misaligned, the pin binds. If the head is overworked, the metal tells you. For students in 2026, this honesty is valuable. Cold connections do not replace soldering, but they establish habits that make later torch work calmer: clean marking, supported drilling, deburred edges and a refusal to force a joint that is not ready.
The sample set below is deliberately small. It can be completed in one bench session and uses inexpensive copper and brass sheet. The aim is not to produce exhibition pieces but to rehearse three related connections: a wire rivet, a tube rivet and a decorative annealed head.
The sample set
Prepare three pairs of rectangles, approximately 20 mm by 35 mm, in 1.0 mm copper and 0.8 mm brass. Keep the pairs labelled so that the samples can be compared later. File the edges flat and remove sharp corners before any drilling begins. A fine marker or scriber line along the centre of each pair will help with consistent placement.
For the first sample, plan a single wire rivet near one end. For the second, use a tube rivet as a simple pivot between two plates. For the third, form a domed wire rivet with a slightly larger head, then finish it cleanly. These are not separate techniques so much as variations on the same discipline: hole, clearance, burr, head and tension.
Measuring and drill alignment
Mark the rivet centre with a scriber and deepen it with a centre punch. Clamp the two plates together before drilling. A drill press is ideal, but a hand drill can work if the work is held vertically and the bit is allowed to cut without sideways pressure. Drill through both plates in one pass where possible, using a sacrificial backing board to protect the bench and reduce exit burrs.
The drill bit should give a close but not forced fit. Test the clearance on scrap metal before committing to the sample. A wire rivet should pass through without wobble; a tube rivet should seat without being hammered into place. If the hole is too tight, the rivet will jam and the plates may distort. If it is too loose, the joint will feel vague and the head will have to work too hard to compensate.
Burr control and clean edges
Burrs are the quiet enemy of a tight joint. After drilling, deburr both faces. A larger drill bit turned by hand can remove the initial lip, but a proper burr or fine file gives more control. Work lightly and check the edge with a fingertip. Do not chamfer so heavily that the rivet head loses its seat. The goal is a clean, flat surface where the two plates can meet without grit or raised metal holding them apart.
Keep the sample clean as you go. Metal dust and filings between the plates will create a false gap. Brush the work down before assembly and keep the bench clear of mixed abrasives.
Forming the heads
Anneal wire and tube before forming heads. Copper wire anneals quickly; tube should be heated evenly and cooled according to workshop practice. For a wire rivet, leave roughly one to one and a half diameters protruding on each side. Form the first head on a steel block with a polished hammer, working around the end rather than flattening it in one blow. Insert the rivet, check that the plates meet, then cut the second side to length and form the second head gradually.
For a tube rivet, flare one end with a burnisher or a suitably shaped punch, insert the tube, then flare the other end. Work slowly. A tube that is flared too quickly will split or buckle. The finished flare should be smooth enough to sit comfortably against the plate and wide enough to retain it without crushing the sheet.
Judging a tight joint by feel
A tight rivet should hold because the plates meet and the heads retain them, not because the sheet has been compressed. Hold the sample between finger and thumb and try to rock the plates. There should be no movement and no visible gap. Run a fingernail around the joint. If it catches, examine the burr or the head. Tap the sample lightly on the bench; a dull rattle suggests looseness. Stop before force becomes the solution. If the joint is not tight, remake the rivet or correct the hole rather than hammering the plates together.
A one-session plan
Spend the first ten minutes marking and filing the sample pairs. Allow twenty minutes for drilling and deburring, checking each hole against its rivet. Use the next thirty minutes for forming and setting the wire rivets, then repeat with the tube rivet. Reserve the final twenty minutes for the decorative head, cleaning and a short written note on what felt uncertain. Label the samples with the drill size, rivet diameter and any adjustment made.
By the end of the session, the student has a physical record of three cold connections and a clearer sense of fit. The torch can wait. The rivet has already taught the lesson that good jewellery rarely begins with force.