Heat Once, Decide Once: Solder Sequencing for Multi-Part Student Pieces
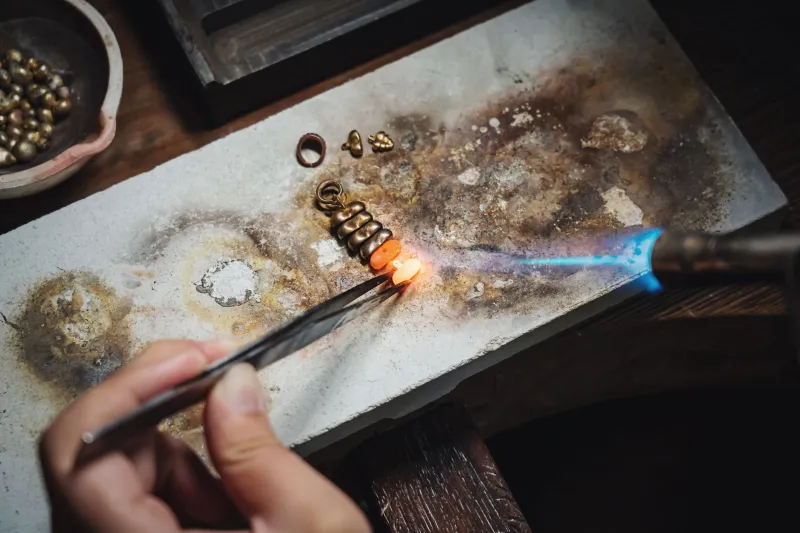
There is a moment in every student's training when the torch stops being the intimidating part of soldering. What intimidates, afterwards, is the piece. A five-part pendant with three joints, a bezel already set, and one curve that must not move: this is not a torch problem, it is a scheduling problem. The flame is simply the instrument that carries out a plan made earlier, at the bench, with a pencil.
The plan is drawn before the metal is cut
A soldering order is best written, not remembered. Before any joint is fluxed, sketch the assembly and number the joints. Then, beside each number, note three things: the solder grade required, the components that must survive that heat, and the direction from which heat will be applied. This single page of notes, kept on the bench and revisited at the end of the session, is the difference between a piece that goes together in four deliberate heats and one that goes together in eleven reactive ones.
The reasoning is straightforward. Every additional heating cycle carries risk: grain growth and softening in the metal, distortion in thin sections, oxide build-up that makes subsequent flow unreliable, and damage to anything already set. Heat is a finite resource in a piece of work, and the aim of a sequence is to spend it as few times as possible.
Build a temperature hierarchy, not a list of joints
UK suppliers label silver solder in grades — hard, medium, easy, and sometimes extra-easy — and these grades are the backbone of any sequence. The rule is simple in principle: work from the highest melting point downwards. The hard solder goes first, at the highest temperature the piece will ever see; medium next; easy last. Each subsequent operation must be capable of flowing solder without disturbing the joint that preceded it.
The practical margin matters here. Silver solder grades typically sit several tens of degrees apart, which sounds generous until a small piece with good thermal conductivity and a broad flame is brought into play. Where the margin is tight, or where a piece is small enough that the whole object reaches temperature together, consider using a single grade throughout and accepting a longer, cooler approach — or plan the piece so that the thermally sensitive joints sit at the extremities, furthest from the heat source.
For gold work, the same logic applies with the added complexity of carat and colour: lower-carat solders flow lower, and a two-colour piece may require the paler metal to be joined first. Students working in mixed metals should map the whole piece on paper before committing, noting where a lower-temperature joint sits next to a higher-temperature one and how close the two will be under the flame.
Protection is part of the sequence
A soldering order is only as good as its protection plan. Where a stone is already set, or a component cannot tolerate the heat, the sequence should route around it. This may mean changing the assembly order entirely — setting after the last soldering operation, rather than before — and it is worth saying plainly that this is often the correct answer. Rehearsing a piece in the reverse order, with setting last, removes the problem rather than managing it.
Where protection is unavoidable, the bench has a small arsenal. Heat sink compounds and pastes slow the rate at which heat travels into vulnerable areas. Titanium clips and pins hold without conducting heat away as aggressively as steel. Wet ceramic fibre or a dampened paper wrap can shield a small section, provided it is kept genuinely damp and the piece is not left to steam. A borax-and-water wash, or a proprietary protective coating, will limit oxidation on surfaces that must stay clean. Third-hand clamps should be positioned so the piece is not levered out of alignment as it expands.
A useful discipline is to write the protection step into the sequence list itself, not treat it as something remembered at the last minute. If step three requires a heat sink on the bezel, step three says so.
Reading the warning signs before a reflow
The most expensive moment at the bench is the one where an earlier joint quietly gives way. It rarely happens without warning. Learn the warnings and the sequence becomes negotiable in real time.
- The flux goes glassy and still. Clear, quiet flux means the piece is approaching temperature; any solder present will be softening.
- A solder seam takes on a bright, liquid sheen. That sheen is the prelude to flow. If it appears on a joint you intended to leave alone, remove the heat immediately.
- The piece settles or shifts under its own weight. Metal that has become plastic under heat will move. Any change in alignment at temperature is a signal to stop and reassess.
- Edges soften and lose definition. Thin sections and fine wire are the first to show it.
- The work starts to glow unevenly. A hot spot on a small component while the rest of the piece is dark indicates the flame is too concentrated and the sequence is being run too fast.
A jeweller who has rehearsed the sequence tends to notice these signals earlier, because they are watching for a specific outcome rather than hoping for one. Heat applied from beneath the work, with the flame directed at the joint's underside, is often the most controllable method for a late joint in a sequence, and it is worth practising deliberately, since the solder is drawn towards the heat rather than chased into place.
The dry run
Before the torch is lit, run the operation without it. Lay out the components in assembly order. Flux each joint in the sequence it will be soldered, and note which joints must be re-fluxed later. Position clamps, binding wire and heat sinks. Pick up the tweezers you will actually use. Confirm the quenching and cooling arrangements — a piece should not be dropped into pickle while still hot enough to distort, and a graded cooling in air is often kinder than an immediate quench.
A dry run exposes the awkward reaches: the joint that cannot be accessed with the piece clamped as planned, the component that will fall when the binding wire is removed, the heat sink that fouls the torch angle. These are cheap discoveries to make without a flame. Students who habitually rehearse tend to report fewer second attempts, and fewer second attempts mean less total heat in the metal.
Recording the order
At the end of a session, write down what actually happened: which joints were soldered in which order, which grade was used, where the protection went, and where the sequence had to be changed. This record has a second life. When the same construction appears again — and in a student's portfolio it usually does — the notes shorten the next planning stage considerably, and they show a tutor exactly how the piece was reasoned about, not merely how it turned out.
What the order buys you
A rehearsed solder sequence is not a guarantee of a clean piece. It is a reduction of variables. It means every heating cycle is entered with a purpose and exited with a result, rather than repeated in the hope that something takes. The torch is a decisive tool, and decisions are best made before it is lit — on paper, at the bench, with the components laid out in front of you.